Introduction
In this article you will learn how to create a Poison Gameplay Effect and how to craft an Antidote to counter that poison.
Prerequisites:
We will need to have an attribute set with at least a Health attribute. If you do not know how to create attributes or attribute sets you can learn this in this other article by me 🔗How To Create Attribute Sets.
Important! This tutorial uses Unreal 5.3, in this version Gameplay Effects have undergone some changes and are more modular now. This is cool, but means that if you use an older Unreal 5 version or Unreal 4 things may look different.
Worry not, however, as all the same features are available in that version, the only difference will be that in the Gameplay Effect all properties will be displayed at once.
Designing the Poison Gameplay Effect
Creating the Gameplay Effect Asset
First we need to create the Gameplay Effect we will use for our poison.
To do so as with any Blueprint asset we right-click on the content browser, select Blueprint Class, and from there we search the Gameplay Effect class
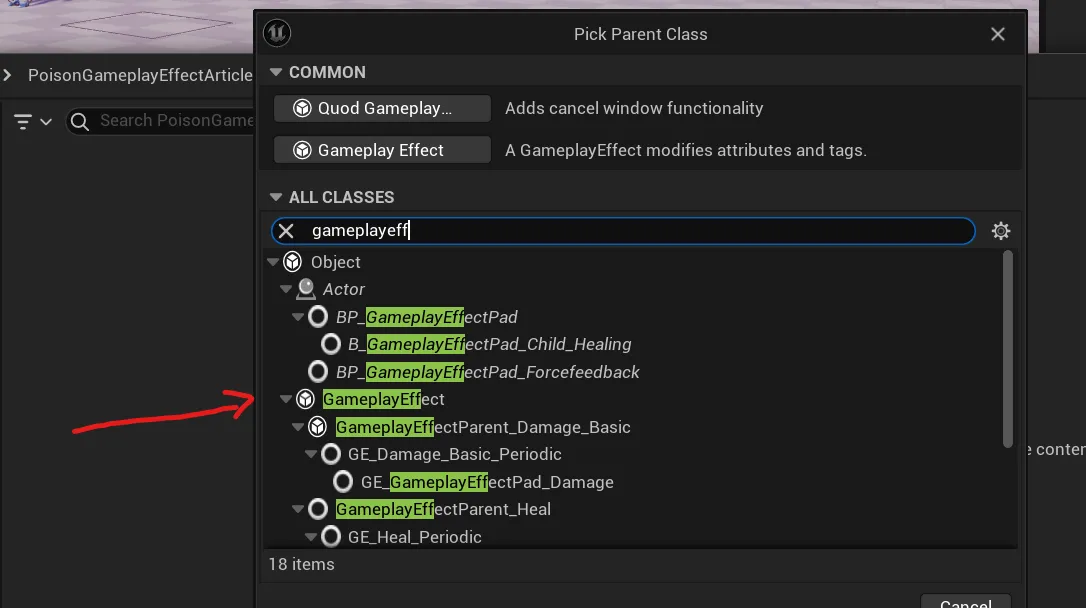
Name the new poison asset whatever you want, in my case I will name it GE_Poison ( GE_ for Gameplay Effect assets )
Open the asset, but before doing anything, we need to do one thing. If you open the effect now you will see something like this:
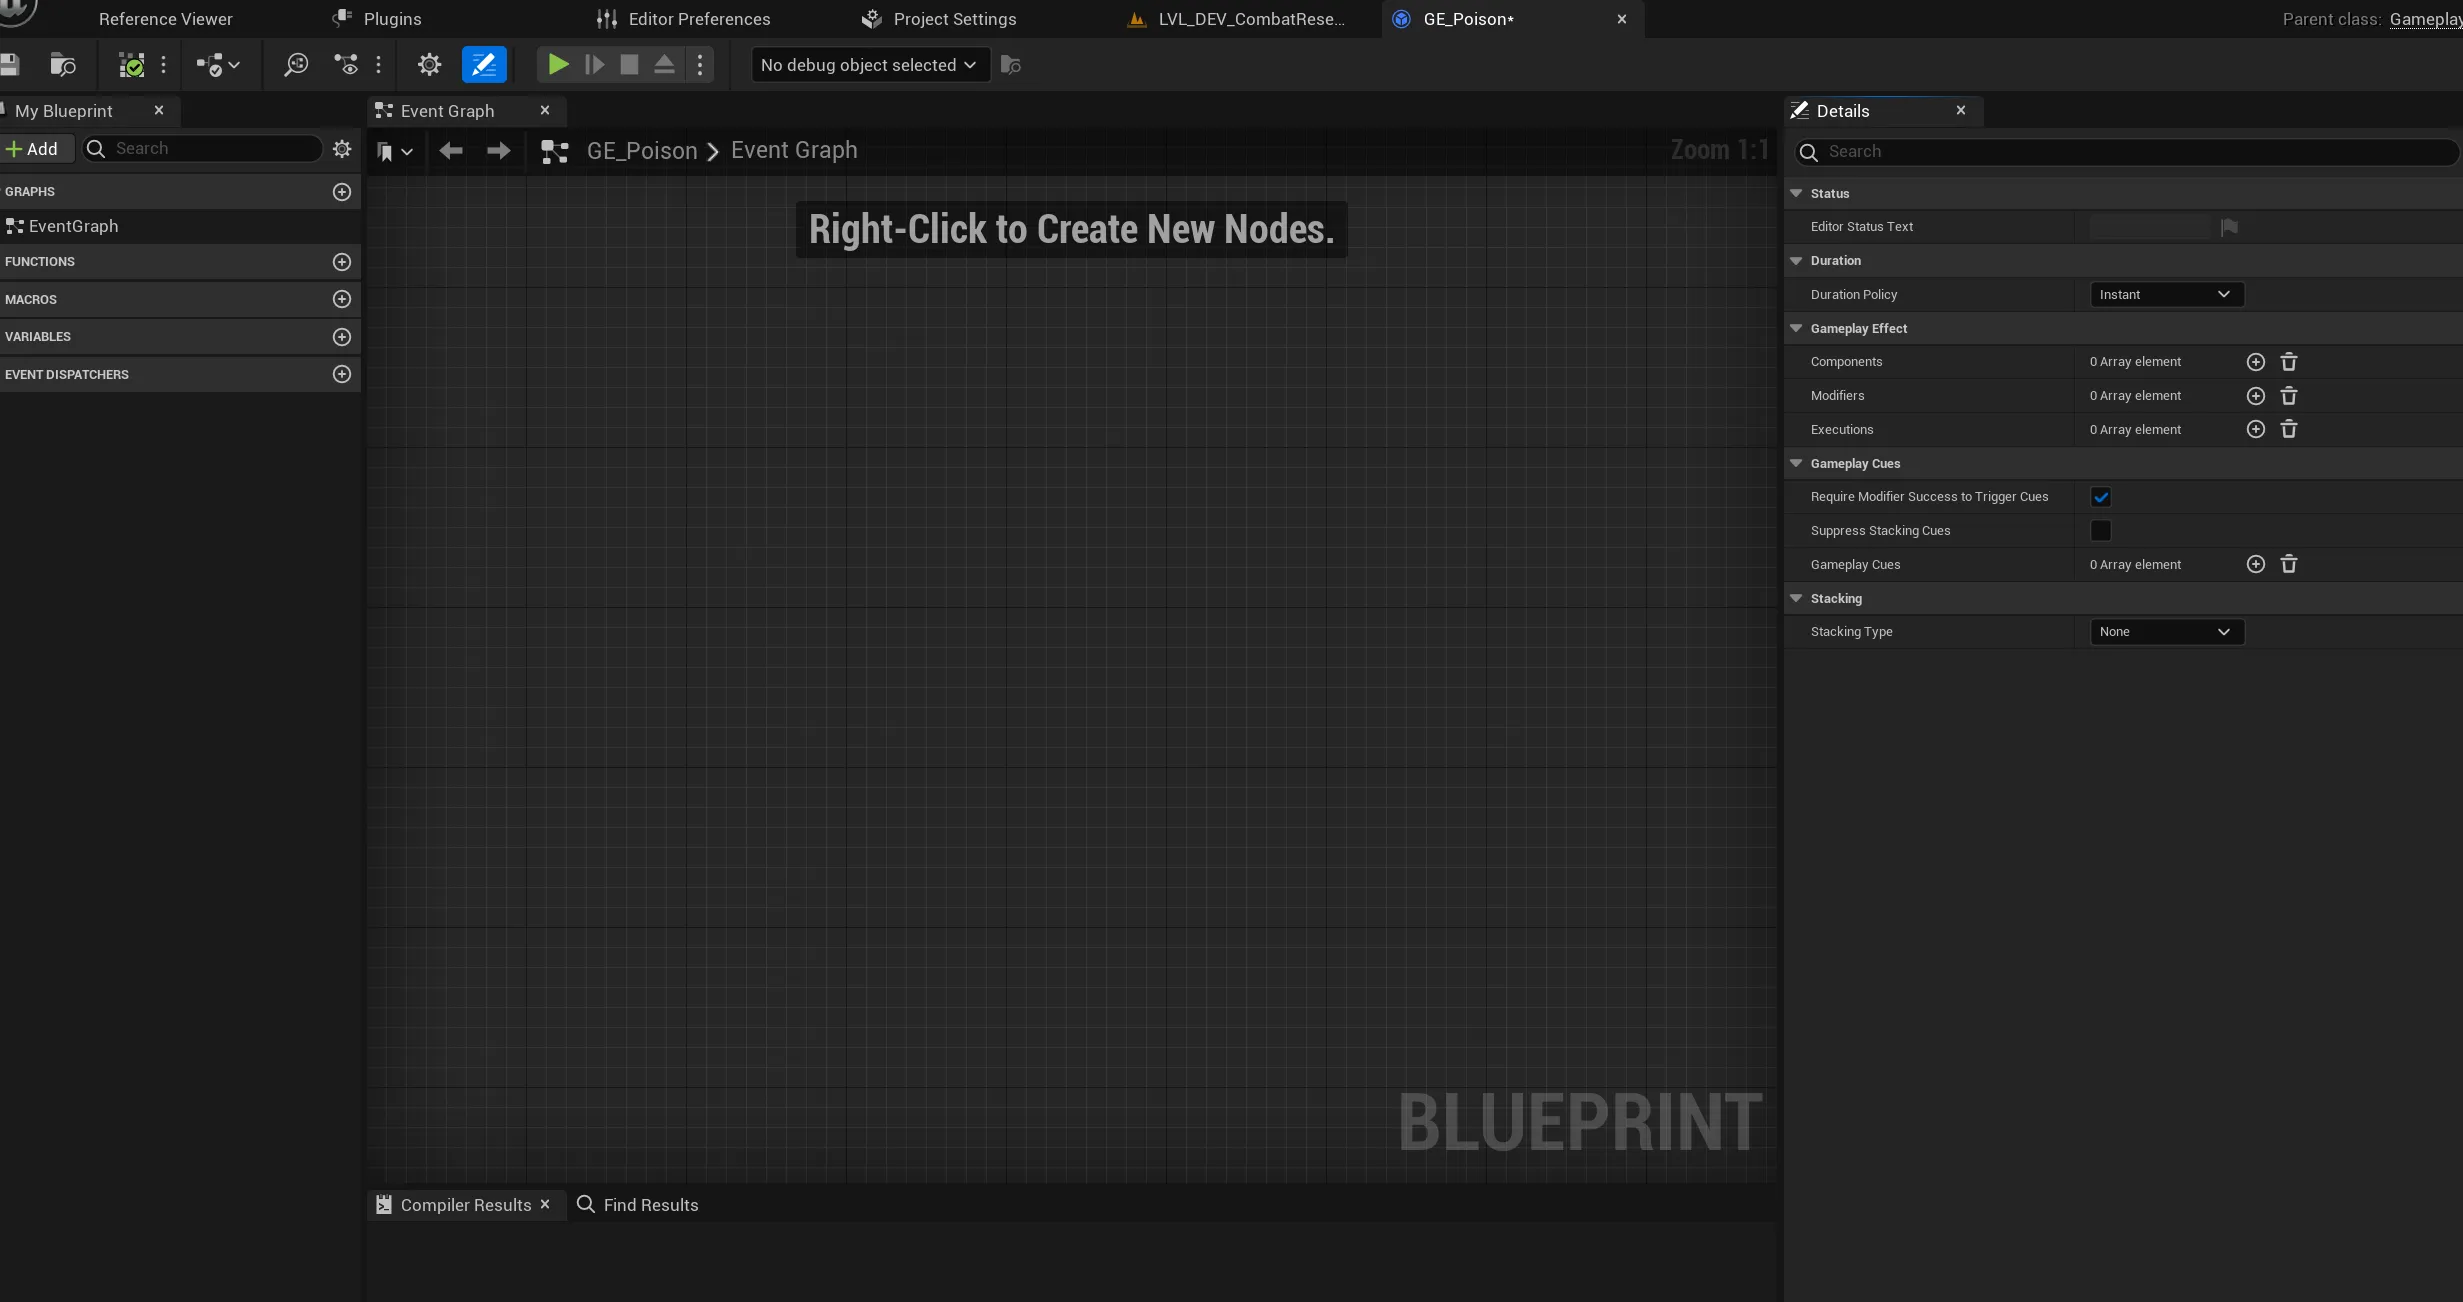
As its a BP asset Unreal thinks that you want to add Blueprint code, but in this case we only care about the data. So until this is fixed, close the asset and open it again. After doing this you will be presented with the proper display of a data-only Blueprint asset.
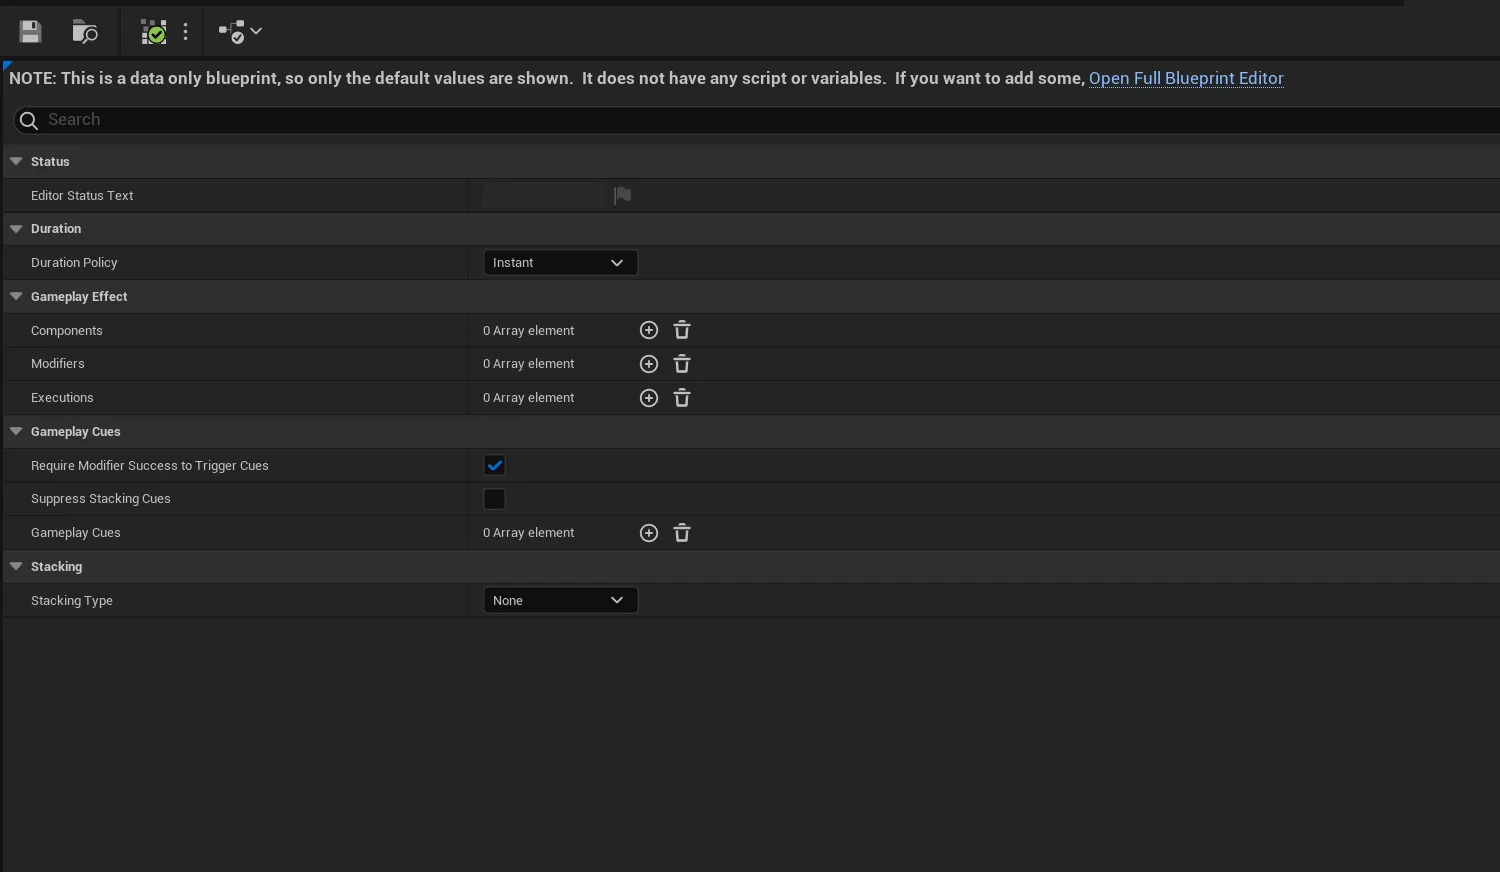
New Unreal Engine 5.3 Modular Gameplay Effect setup
Now, we are ready to configure our poison effect.
Implementing the poison effect
Gameplay Effects have tons of properties, especially if you are using a version of Unreal before 5.3. If you don’t find a property, simply search its name on the top search bar.
Duration Setup
The first thing we are going to modify is the Duration Policy.
By default effects are Instant, this means that the effect applies and then that’s it, it has done its job. This is good for instant modifications of attributes like damage, healing, gaining a level, recovering stamina… but in our case we want our poison to have a set duration, so we are going to set the Duration Policy to Has Duration.
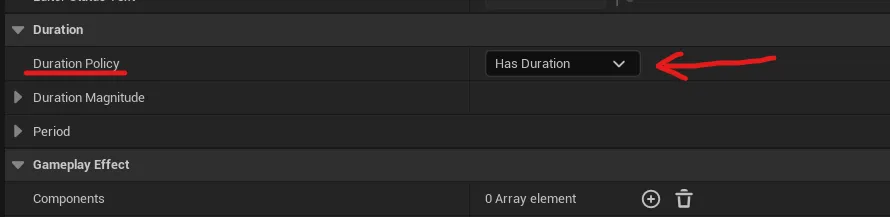
Setting the gameplay effect to this new Duration Policy type will enable us now to set some new values, those are the Duration Magnitude and the Period.

To put things simple, Duration Magnitude is how much time in seconds does the effect last.
Period allows us to set an interval that will make the effect execute each time that amount of time passes.
In our case we are going to set a Duration Magnitude of 10 seconds, to make the poison last that long, and a Period of 1 second, to make the effect execute every second. So in total we will receive 10 poison ticks.
Modifiers Setup
Now we have our Duration data set-up, but we need now for the effect to actually do something. To do that we are going to add a new Modifier.
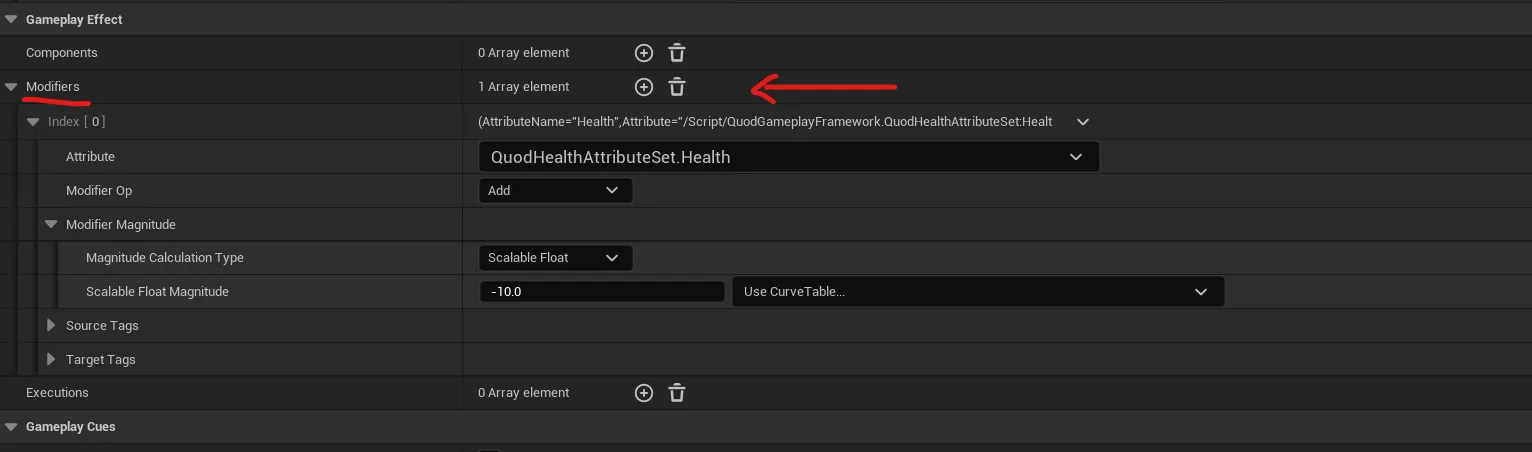
Modifiers, as their name implies, is the way Gameplay Effects have to interact with Attributes. A modifier has multiple properties but the ones we care about are:
- Attribute: The actual attribute we are going to modify
- Modifier Op: How that attribute is going to be modified
- Modifier Magnitude: The actual value we are going to modify this attribute with
In our case we want to modify the Health in an Additive manner ( no subtraction operation exists ) and we want to reduce 10 health each tick, so we add a value of -10.
Just before we finish this, we could go into extreme detail into all the cool things that can be done, but let’s look at one last thing about modifiers.
In games it’s quite common to have some effect types that don’t apply a set value, but which its value depends on other attributes.
For instance, we could set it up so that the poison causes damage equal to a percentage (%) of the player health.
To do so we can set it up like this:
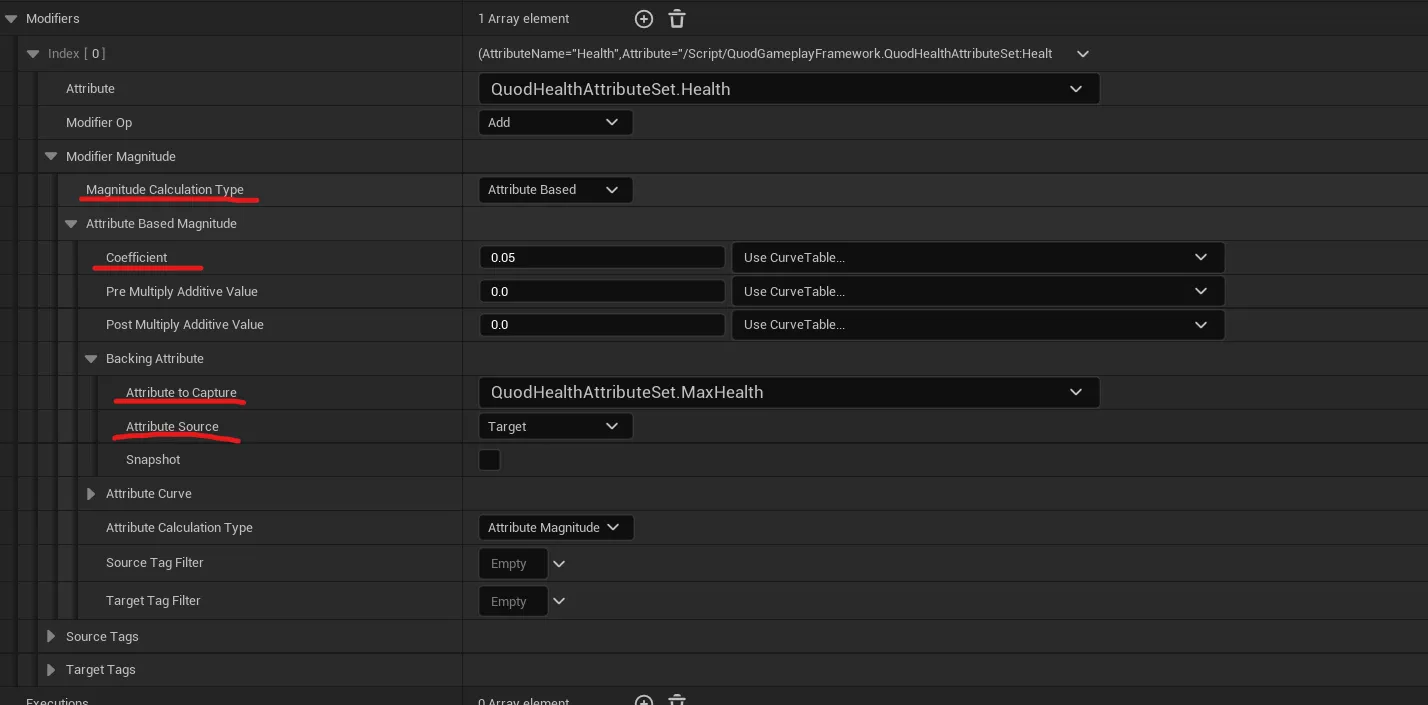
Change the Magnitude Calculation type from a simple float to Attribute Based. This will allow us to set the value based on another attribute. From here we will use the following properties:
- Attribute to Capture: Which attribute we want to base our calculation on, in this case the Max Health
- Attribute Source: We want to use the Max Health of the Target we are applying the effect to
- Coefficient: How much of Max Health, in this case we are taking away 5% of the max health each tick of the effect by setting the coefficient to -0.05 ( as Max Health is positive )
As you can see this is only a glimpse of the multiple ways effects can be configured, but I think it was worth showing it here as it will be extremely helpful.
Testing the Poison Effect
To confirm that the poison effect is working we can apply it to our character at the press of a button to try it out. ( In a game environment a spell, or maybe a swamp area would apply the effect to us )
We can do this easily by going to the level Blueprint and creating this script:

Gameplay Effect Class is going to be the GE_Poison we created.
Important! This will only work if you character is properly setup with an Ability System Component. If you are using Lyra you should be good in that regard.
Once you hit play, you can use the console command AbilitySystem.DebugAttribute <NameOfYourAttribute> ( in my case AbilitySystem.DebugAttribute Health ) to display the Health on-screen if you are not already doing so.
Now simply, hit the key 8 on your keyboard and watch as your player health starts depleting for 10 seconds.
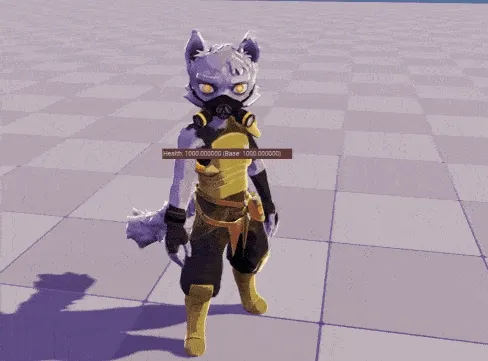
This seems to be a rather ineffective mask
In the gif you can see Gameplay Cues providing visuals, but this is out of the scope for this article, so we may go over Gameplay Cues on another article.
Crafting the Antidote Gameplay Effect
Now that we have a poison effect, we would like to have a way to cure that poison. This can come from an item we drink, a spell we cast, or simply resting at a bed/inn in our RPG game.
Tagging the Poison Effect
To create this cure we are going to create a second Gameplay Effect, but first, we need to modify our original poison effect.
To do this we are going to use the Unreal Engine 5.3 Asset Tags Gameplay Effect Component.
( If you are not yet using Unreal 5.3, simply search for the Asset Tags property )
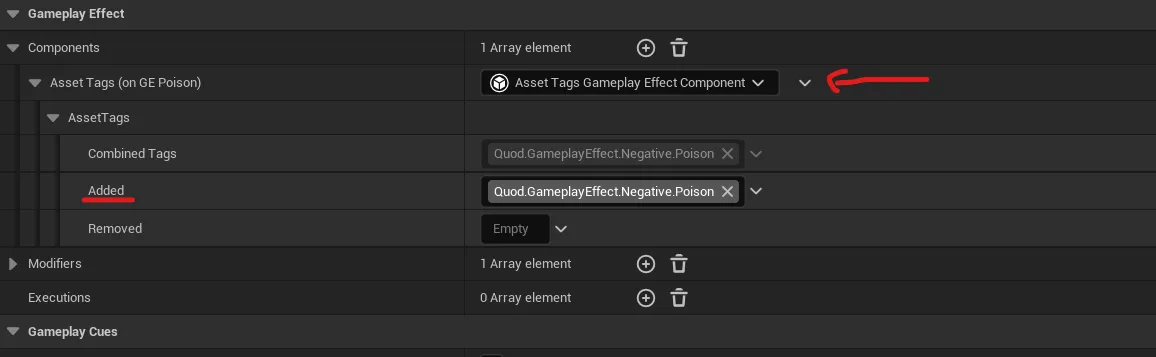
Asset Tags are a way to tag the effect asset in certain ways for the system to be able to identify this particular effect or put it in a group.
The way that tag containers work in Gameplay Effects is that they have a Combined Tags, Added and Removed properties. This is to allow inheritance to work properly, usually you only modify the Added or Removed properties and the Combined Tags will get auto-updated for you.
On the Added tags we are going to set the tag QuodGameplayEffectNegativePoison and with this the GE_Poison is ready for this part.
Configuring the Antidote Effect
Now create a new Gameplay Effect ( remember: right-click on the content browser, Blueprint Class, Gameplay Effect ) and name it something like GE_PoisonAntidote. Remember to open and close it one time so you get the data-only blueprint view. ( This is not required, you can modify the properties on the right, but I find the data-only interface more clear )
We want this effect to be Instant, as we want this to remove the poison and then be done with it.
To do this what we will use is another GE Component, the Remove Other Gameplay Effect Component
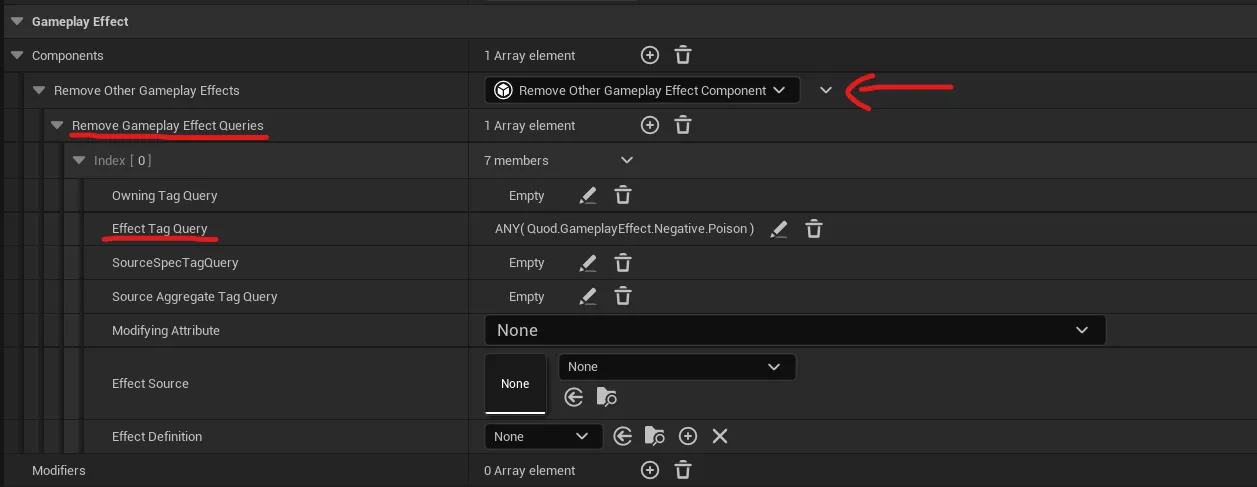
This component allows us to remove other Gameplay Effects that match certain parameters. In this case, we could simply set the Effect Definition to GE_Poison and be done with it, but working with tags allows your systems to be much more encapsulated and versatile.
We are going to add an Effect Tag Query, this is going to run a query against the Effect Tags we added to our poison effect.
In this case, we are going to say that we want to remove all the effects that have any tag that matches Quod.GameplayEffect.Negative.Poison.
And in reality, we are done, with this the antidote has been created.
Now if we are poisoned, we simply need to apply this effect, and the GE_Poison effect will be removed.
( If you are using an Unreal Version prior to 5.3, what you need to search for is called something like Remove Gameplay Effects With Tags, or Matching Tag Query )
Some Extra Thoughts: The Versatility of Gameplay Effects and Tags
As you see, now we could start creating other effects like Burning, Blinded, Slowed… and you may have seen that I set the tag like this QuodGameplayEffect.Negative.Poison.
This is in purpose, as now we could tag these effects in the same manner: QuodGameplayEffectNegativeBurning, Quod.GameplayEffect.Negative.Blinded, Quod.GameplayEffect.Negative.Slowed.
And if we want a Cure All type of item, we simply need to say that the Remove Other Gameplay Effect Component will remove any effect with the QuodGameplayEffectNegative tag and it will work.
One advantage of working this way, is that if in the future if you add other Negative status effects, you don’t need to modify any code for them to be removed by the Cure All effect, by simply tagging them properly it will work automatically.
Recap
The whole poison and antidote flow comes down to configuring data:
- Poison is a Has Duration effect with a Period set, plus a Health modifier that subtracts on every tick. Make the modifier magnitude Attribute Based if you want the damage scaled off Max Health instead of a flat number.
- One gotcha worth knowing: a periodic effect executes its modifier on every tick the same way an Instant effect does, so it writes to the attribute’s BaseValue. That is why the health lost to poison stays gone after the effect expires, unlike a plain Has Duration modifier with no period, which only touches the CurrentValue while active and reverts when it ends.
- The antidote is an Instant effect with a Remove Other Gameplay Effect Component running a tag query. Tag the poison Quod.GameplayEffect.Negative.Poison, and a query against the broader Quod.GameplayEffect.Negative gives you a cure-all that also catches Burn, Slow, and any future status you tag the same way.
With attributes and tags in place, new effects are just more data:
- Slow: Has Duration 5s, Period 0, Speed attribute, Multiplicative, 0.5 coefficient
- Mana Drain: Has Duration 20s, Period 0.2, Mana attribute, Additive, -1
What this doesn’t cover
The visuals in the demo come from Gameplay Cues, which this post skips. It also stays single-player: applying and removing effects across the network, and predicting them on clients, is where GAS gets harder and is a topic of its own.